Cracks in High-Pressure Cast Valve Shells of 660 MW Units
On this page
1. Overview
The 660 MW Unit was put into commercial operation on November 27, 2009, and accumulated 12,854 hours of operation before the first A-level overhaul in September 2011. Currently, 14 high-pressure casting valves with a nominal diameter of 4 inches or more are installed. During the overhaul, the valves were inspected using non-destructive testing, revealing cracks in the valve shells of the electric valves behind the left and right regulating valves of the first-stage cooling water, the electric main valve of the second-stage cooling water, the electric valve of the reheater cooling water main pipe, and the main feed water electric valve.
2. Cause Analysis
The cracked valve bodies are all alloy steel castings. Casting is a method of forming metal in its liquid state. The quality of castings is closely related to the alloy's casting properties and process. Cast steel has poor casting properties due to its high melting point, poor fluidity, and high shrinkage rate. Additionally, it undergoes severe oxidation and gas absorption during the smelting process, leading to defects such as insufficient fusion, cold shuts, shrinkage, deformation, cracks, slag inclusions, sand sticking, and gas holes.
During the casting of alloy steel, the "sequential solidification" method is adopted. "Sequential solidification" involves placing "risers" in areas of the castings where shrinkage cavities may form or where the last solidification occurs (usually in thicker sections or the top of the castings), allowing the casting to solidify in the order of parts farthest from the risers first, followed by those closer, and finally the risers. Sequential solidification causes significant temperature differences, high thermal stress, and considerable deformation in the castings. During the solidification process, the shrinkage of each part is inconsistent due to varying cooling rates in different sections of the metal. Additionally, the mold and core restrict the solid-state shrinkage of the casting, generating stress within the casting. To eliminate stress in the mesh gate, alloy steel castings generally undergo final heat treatments such as quenching and tempering. However, due to the complex wall thickness of the cast valve, slight deviations in controlling the heat treatment process can result in significant residual stress.
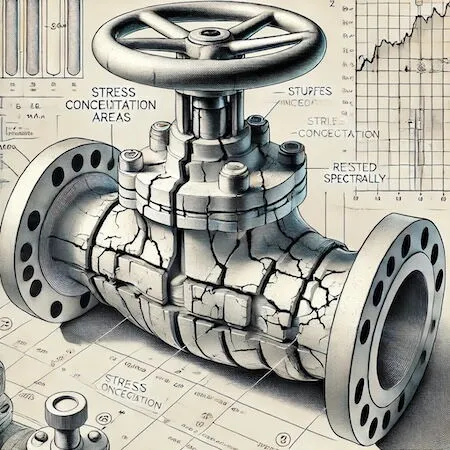
The valve body with cracks was re-tested spectrally, and the results met the standard requirements; the S and P impurity elements did not exceed the allowable limits. Macroscopic inspection and analysis revealed that the cracks in the valve body were all located on or near the surface, with deeper cracks occurring in stress concentration areas where there were significant structural changes, as shown in Figure 1.

Figure 1 Cracked valve body
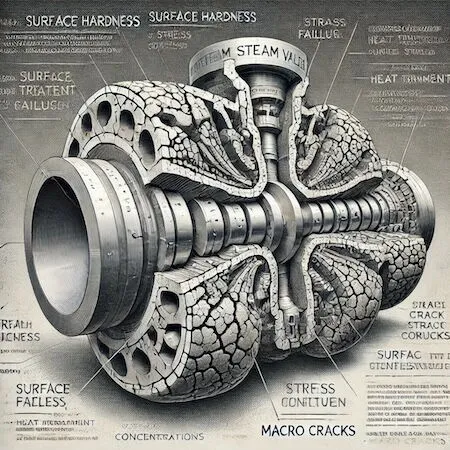
When internal stress exists in the casting, it remains in an unstable state. Additionally, the steam valve system experiences complex forces, and variations in the size and shape of its structure lead to significant stress concentrations. Under the combined effect of working stress and thermal stress during the start-stop process, the original casting crack source expands, forming macro cracks. Improper control of the heat treatment process caused the shell surface hardness to exceed the standard. The hardness of pressure-bearing cast steel after heat treatment is typically designed to be 160 to 200 HB. Excessive hardness reduces the plasticity and safety performance of the valve shell. The surface hardness of the main valve exceeds 340 HB. As the internal stress gradually releases during operation, a group of cracks forms, occupying nearly 35% of the shell surface area (Figure 2).

Figure 2 Shell surface cracks
During the casting of alloy steel, the "sequential solidification" method is adopted. "Sequential solidification" involves placing "risers" in areas of the castings where shrinkage cavities may form or where the last solidification occurs (usually in thicker sections or the top of the castings), allowing the casting to solidify in the order of parts farthest from the risers first, followed by those closer, and finally the risers. Sequential solidification causes significant temperature differences, high thermal stress, and considerable deformation in the castings. During the solidification process, the shrinkage of each part is inconsistent due to varying cooling rates in different sections of the metal. Additionally, the mold and core restrict the solid-state shrinkage of the casting, generating stress within the casting. To eliminate stress in the mesh gate, alloy steel castings generally undergo final heat treatments such as quenching and tempering. However, due to the complex wall thickness of the cast valve, slight deviations in controlling the heat treatment process can result in significant residual stress.
The valve body with cracks was re-tested spectrally, and the results met the standard requirements; the S and P impurity elements did not exceed the allowable limits. Macroscopic inspection and analysis revealed that the cracks in the valve body were all located on or near the surface, with deeper cracks occurring in stress concentration areas where there were significant structural changes, as shown in Figure 1.

Figure 1 Cracked valve body
When internal stress exists in the casting, it remains in an unstable state. Additionally, the steam valve system experiences complex forces, and variations in the size and shape of its structure lead to significant stress concentrations. Under the combined effect of working stress and thermal stress during the start-stop process, the original casting crack source expands, forming macro cracks. Improper control of the heat treatment process caused the shell surface hardness to exceed the standard. The hardness of pressure-bearing cast steel after heat treatment is typically designed to be 160 to 200 HB. Excessive hardness reduces the plasticity and safety performance of the valve shell. The surface hardness of the main valve exceeds 340 HB. As the internal stress gradually releases during operation, a group of cracks forms, occupying nearly 35% of the shell surface area (Figure 2).

Figure 2 Shell surface cracks
3. Treatment Measures and Precautions
3.1 Repair Welding Process
Grind the surface to remove defects. The complete removal of defects is checked and confirmed using non-destructive testing methods, such as magnetic particle flaw detection. When grinding, ensure that the defects are removed, minimize the wear area as much as possible, and consider the needs of repair welding. After confirming complete defect removal, measure the depth and size of the defects, and replace valves with severe defects identified in items 1, 2, and 4. Replace these with forged valves matching the required specifications, parameters, and materials. Other valves are repaired by welding. If the defect removal range maintains the minimum wall thickness of the valve, the area around the defect is polished smoothly; otherwise, repair welding is performed if the minimum wall thickness is exceeded. Castings that leak during the hydraulic pressure test, have a repair welding area greater than 65 cm², or have a depth exceeding 20% of the casting wall thickness or 25 mm are considered significant repair welds under ASTM A217/A217M-2010, "Specifications for Martensitic Stainless Steel and Alloy Steel Castings Suitable for High-Temperature Pressure Parts" (hereinafter referred to as the "A217 Standard"). For such significant repair welds, the A217 Standard recommends either stress relief or complete reheating treatments, both of which must be performed using an approved method. Therefore, a specific repair welding process must be developed for significant repair welds.
3.1.1 Environment
There should be no strong wind; the humidity must not exceed 75%, and the temperature should be above 10°C.
3.1.2 Operation Process
Before welding, all cracks must be removed mechanically, and rust and dirt within 10–15 mm around the welding area should be polished to reveal the metallic luster. Depending on the specific situation, the repair area should be polished into a U-shaped or V-shaped groove. When grinding, it is important to start from both ends of the crack to prevent it from expanding during the process (a stop hole can be made if necessary). The angle and width of the groove should be as narrow as possible to effectively eliminate the crack. For defects with a depth of more than 30 mm, the groove width should not be less than 20 mm to prevent defects such as slag inclusion or incomplete fusion during welding. Before welding, magnetic particle inspection or dye penetrant inspection must be performed to confirm that there are no defects such as burrs, interlayers, or cracks in the groove. Welding can only be performed after the inspection is passed.
When starting to weld, the area should be divided into several sections and welded one by one. The welded area and the surrounding 50 mm must be heated to 70–80°C using flame heating. When heating, the flame should be moved quickly without concentrating on one point, and the surrounding temperature should be kept above 70°C. Before repair welding, the cooling rate should be measured within the range of 2–3°C per minute. During repair welding, argon arc welding should be used to form a 3–5 mm transition layer on the entire substrate. After welding the base layer, the weld should be allowed to cool to ambient temperature in insulation cotton, and no cracks should be present after dye penetrant inspection. After grinding, the welding rod is used for filling until the entire weld is completed.
When welding, small wire energy, fast, slightly swinging welding, and thin welds should be used. The current must be controlled as follows: argon arc welding at 125 A or less, electric welding at 70 A (2.5 mm) or less, and 90 A (3.2 mm) or less. The specific requirements are that the base layer weld width must not exceed 3 mm, and the length must not exceed 30 mm. The thickness must be controlled within 3 mm, and a dedicated person must hammer between layers immediately after welding. For deep layers, use a 0.5-pound or 1-pound hammer to strike a round-headed chisel to relieve stress. If available, use a hammer directly to relieve stress. Avoid using excessive force when hammering. Hammering should create clear pitting marks on the weld surface, 8 to 10 times per cm². In the area of heated repair welding, the skip-welding method should be used. Avoid concentrating the welding in one place to ensure uniform overall temperature and prevent rapid local temperature rise.
After each section of welding, the temperature must drop below 70°C, allowing the hand to touch the weld before proceeding with the next section. The filling layer should consist of a nickel-based weld of the same material. The interlayer temperature of each weld must not exceed 50°C; the weld length must not exceed 30 mm; the weld width must not exceed 3 mm, and the thickness must be controlled within 3 mm. After welding, the weld should be hammered. The welds should overlap by half and must not form deep grooves. After each section of welding, a macroscopic inspection should be conducted, and any defects should be eliminated immediately. The temperature between welds should be measured using a temperature gun.
For post-weld inspection, grind the entire weld to create a smooth surface. After welding, conduct a macroscopic inspection for defects, then wrap the weld in insulation cotton. After cooling to ambient temperature, perform a dye penetrant inspection. If no cracks are present on the surface, the weld is qualified. Perform a second dye penetrant inspection after 7 days. If no cracks or defects are found on the surface, the weld is qualified.
3.2 Precautions
Before welding, fully analyze the welding performance of both the parent material and the welding material, along with the physical properties of the metal itself. When using nickel-based welding materials, first weld a 3–5 mm transition layer on the substrate, and then weld the filling layer. Strictly follow the established welding process and control the interlayer temperature to remain below 70°C during welding. Use the argon and electric method with a 2.5 mm diameter electrode, ensuring a low defect rate to maintain welding quality. Implement short-pass and skip welding methods throughout the welding process. Each layer of weld should be hammered immediately to eliminate stress, and it should be kept warm while cooling slowly after welding.
4. Conclusion
High-pressure casting valves are still widely used in supercritical and ultra-supercritical units due to their relatively low price. Due to the manufacturing process, avoiding slag inclusion in gas holes is difficult. Although stress is released after the final heat treatment, residual stress persists due to the complex structure, thick wall, and large size of the valve. During use, the residual stress in the casting is redistributed. When superimposed on other stresses, it increases the tendency of the casting to crack. Cracks occur when the comprehensive stress value exceeds the tensile strength of the alloy. Therefore, to ensure safe operation, power plants should establish special supervision measures for high-pressure casting valves, scientifically formulate inspection cycles based on the specific conditions of the valves, and conduct regular inspections. It is recommended that cast valves be replaced with forged valves when conditions permit.
Previous: Errors in Valve Installation and Their Consequences
Next: Structural & Stress Analysis of Cryogenic Top-Entry Trunnion Slope Ball Valves
Next: Structural & Stress Analysis of Cryogenic Top-Entry Trunnion Slope Ball Valves


